The first game has finished with a British victory!
Forces
The Paras have their full platoon. 2 Senior Leaders (SLs), 2 sections with Bren and Rifle teams and Junior Leaders (JLs). 3 Section has 2 Bren Teams and 1 sniper, while the Platoon HQ has another sniper, a PIAT team, and a 2″ mortar to round them out. With 1 point of support, Lucius took a jeep. The Para’s force morale started at 10.
The SS Platoon has 1 SL, and 3 squads with an LMG gunner and assistant with 2 riflemen in an LMG team, and a rifle team of 5, along with a Junior Leader (JL). In support, I took another squad with JL, a sniper team, and a Forward Observer. Based on the support points available, I was sorely tempted to bring on Jagdpanzer IV as I knew that with only 1 point of support, the only weapon available to the Paras would be a PIAT. The 16th SS force morale started at 11.
Terrain and Objective
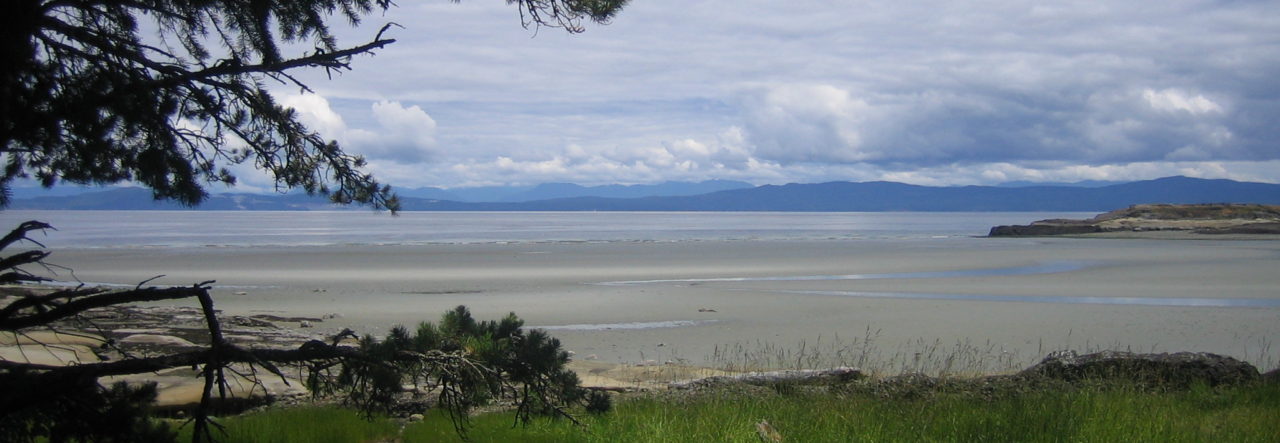
(note that all pictures in this post are clickable for larger resolution)

Rather than draw everything out on the computer after the fact, we strung a GoPro camera from the ceiling. It was getting low on battery and we were trying to work out shots, so there are fewer pictures than intended and they are a bit off centre. There is a post-battle flyover that will be added to this post after editing. I think the overhead pictures work well, but for the next game we’ll be taking more pictures of the action.
The Utrecthseweg’s double lanes dominate the battlefield. To the north is a manor house, surrounded by wire fences (in our case picket fences). These fences are not cover, merely a wire obstacle. The woods are fairly thick and provide light cover.
The objective of this map was to cause the other side to withdraw due to force morale.
My Plan
Despite the official goal, my real objective was to put as much hurt on 5 Platoon as I could. I don’t have to win every battle. I only need to win one of the four in the campaign. By weakening 5 Platoon I can encourage Lucius to swap out to his back up platoon early, as I am guessing that the final actions of 4 Platoon will be what decides the campaign.
In order to hurt the Paras while remaining untouched myself, I had planned to move my patrol markers up and get close enough to put a Jumping Off Point (JOP) near the Manor. In that building, with its hard cover, I could enter into firefights without much problem. As I had the higher force morale, I would be going first, meaning that my FO would start the call for fire immediately. The presence of the wooded terrain made the choice of FO easy, as the overhead trees mean that all firing is at close range on the tables, not effective, which doubles the chance of hitting an elite soldier.
The other way to hurt elites is HE (which were expensive, though I did consider taking a Pak 36 and using it as an anti-infantry gun), or snipers. So, I took a sniper team. My sniper team was going to fire from the building or from the edge of the very open road, and build up shock and casualties and hopefully slow up the advance so my squads could pour some more fire on the Tommies.
My support squad would anchor the JOP by the road to force the Paras to attack the Manor first. I would abandon my far left as it would spread me too thin and holding my baseline isn’t the goal. I would try to pin a section or two and use my squads in cover (with a sniper) to put enough fire downrange to rack up the kills. I would also try to keep my risks down and my force morale high, and pull back once I had caused 4 or more kills with equal or better force morale before I pulled everyone back.
Deployment

As you can see, my patrol markers didn’t get far enough out! I probably should’ve chosen to use 3 instead of 4 to get my movement further forward.

Well. My JOPs are not where I wanted them – I couldn’t get one close to the Manor. I will anchor my defence around the woods, and I may try to push a squad towards the Manor. The FO will definitely call for fire immediately, that much of the plan can remain the same. If all else fails, I will hold the small wood and force the Paras to come to me there.
The Battle
As I had the higher force morale, I went first. I managed to get my Forward Observer (FO), on the table, and an infantry squad. I put the supports on first, in order to hold my main platoon back for as long as possible. I get no replacements, so I need to keep my platoon whole. Sadly, I forgot to put the squad on overwatch, which would cost me later.
The Paras answer with a sniper deploying and taking a shot (thank goodness I had my squad near my FO), but his round went high. 2″ mortars then entered the woods and dropped HW on my squad – and got a kill on the rifle team! The Para’s Platoon Sergeant showed up as well, and 1 Section deployed on my left.

Then a second sniper showed up, and killed one of the LMG team. I had not factored in snipers in my plan…

So far, this was going as I thought it would. Granted, 2 casualties right off the hop wasn’t ideal, but my core platoon was safe, and those Paras all looked conveniently close to each other.

My FO, having bullets whizzing by and mortar shells landing close by, called for fire without a ranging shot. The barrage came down nicely and covered all of 1 Section and the two snipers! Sadly, it only managed to put some shock on 1 Section, but it does pin the snipers and a third of his forces.

For now. I deployed my 1st squad, aiming to get as closed to the fence as possible. I wanted to see if I could make a dash for the house. Sadly, without another unit on overwatch this was an unsound idea. This is where not having a second base of fire (the Manor) cost me. To be honest, this is also where not keeping to my original plan of not accepting risk also got me…

The Paras then got angry with the barrage. 2 Section deployed in the woods at the beginning of a four (!) consecutive phases. I swear, every activation roll 6’s showed up but when it came time to roll for casualties it was all 1s and 3s. To note: we did follow the errata, and used a separate die for the 6th dice, so these double phases were accomplished on 5 very lucky dice.
Next, the mortar fired again and wounded the support squad’s Junior Leader (JL)! My force morale drops 2 to 9 on a terrible roll. Apparently in the short time helping the platoon he made an impression.
The mortar repeated for its final round, putting shock on the rifle team as 2 Section crept forward and fired at my squad by the fence, causing some shock and hitting a soldier. 3 Section, with its 2 Brens deployed and fired at my support squad (that should’ve been on overwatch)! Luckily it only put some shock on.

I was now facing almost the entirety of 5 Platoon, and I had 3 dead to none, and my force morale was lower, so even if I did cause casualties, I would need to do disproportionately more. Not good.
The 2″ mortar, my old enemy, then dropped smoke in front of the LMG team of my support section. Great. Across from them in the treeline, 2 and 3 section go into overwatch, waiting to fire if I twitched.

Which I did. I needed to get 1st squad out of there. Sadly though they were only 3″ away from cover, they only moved 2″. The fire from across the way killed 2.
That was it. My Senior Leader (SL) showed up to take charge. He ordered the support squad’s rifle team to fire back, but with several casualties and shock building up, they didn’t accomplish anything except for drawing fire and becoming pinned.
The mortar barrage continued on the orders of the SL and it killed a sniper! Sadly, it did little else, and the Para’s force morale remained steady at 10.

The Para’s Platoon Sergeant then got 2 and 3 Sections to continue the firefight, adding shock and another casualty to the two squads facing them.
I was feeling a little trapped at this stage. My left flank was steady, but I had little that could answer the Paras. Even if I got a squad shaken out to fire back, hitting elite troops in light cover would require rolling a 6 to hit, and then another 6 to kill.
My next phase had the barrage kill a member of the Bren team, which was something. 2 kills with the difference in force morale meant that I would have accomplished something if I had to withdraw. I tried to move my injured 1st Squad back into the trees, but they got savaged, and my rifle team was wiped out. Thankfully the brutes in 1st Squad weren’t too popular and my force morale held.
Then, with smoke in front of my support squad, 3 Section fired at my FO. Who managed to survive, somehow.
I knew that I was losing the firefight and that the Paras would begin to close. The Oberscharfuhrer ordered the barrage to continue, which killed a man in the rifle team of 1 Section, and killed the other sniper! The Para’s were getting frustrated with their inability to move forward on that flank, and their force morale dropped to 9, equalling mine.
In my final phase I managed to get my sniper on the table, and he shot and killed a rifleman of 2 Section.

Having caused some casualties, the Oberscharfuhrer looked around and decided to fall back. He had found the Tommies and had caused some hurt on them and delayed them a bit. His troops had held their nerve under fire against better forces. It was time to fall back and bring up additional supports.
Could I have fought for another phase? Yes, but with equal force morale there were 5 casualties on the Paras that would count. There was no guarantee that I would keep my force morale level with them, or that Lucius wouldn’t get (another!) double phase. Paras are able to activate their JLs on a 3 or 4, so with 6 dice, he was going to find it easy to use fire and movement to close me. Even though I did have my sniper on the table, I had rolled so few “1s” that I didn’t have much confidence in holding on. It felt like I was hoping for something to change. I told myself that I didn’t have to win this one (and that hope is not a valid course of action) and withdrew with my platoon (mostly) intact.
The Bill
Both forces ended with equal force morale and 5 casualties. That translates to 2 men permanently gone, 2 men in the aid station who will miss the next fight, and 1 man who returns for the Probe at the Crossroads. While my platoon must last through 3 more games, I think this is a fair trade. I didn’t follow my plan to keep risk low, and so took too many killed for what I accomplished, but even so, to come out even is good enough. For now.
Consolidation
On the Para’s side, the CO’s opinion increases by 2, while the men’s opinion is up by 1, thanks to the relatively light casualties. Jimmy Cleminson, the Platoon Commander’s mood shifts to secure.
The Oberscharfuhrer looked at his men. They were pleased. Krafft was a little upset at his withdrawing without causing more casualties, but Staufen was cheerful. The Tommies were on terrain that he knew, and he would get his troops moving in just a few minutes to meet them again.
Nice report. Those Elites are difficult to hurt so you did well.
Hi I am about to embark on this campaign but I have a few questions around some of the things I have read in the aar
How does the 6th dice work for the paras?
Where can I find details around the para jls activating on a 4 or a 3?
Hi Bill,
I believe I’m tracking this conversation also on the TFL forum. I’d recommend using the 6th die like it’s written in the 1940 Handbook, otherwise it just becomes too much and double phases become the norm. The Para’s in this are tougher than KGvL and can push hard and fast. Let me know how this campaign goes – we’ve been unable to play out here (note the lack of posting) but are dreaming of the days ahead!
Would you go with additional 6s converting to 5s or being ignored?
Yes as I said on the forum we are managing to game remotely using a table in my garage, WhatsApp And Rolz for dice throws – seems to work really well Nd is keeping me sane
We ignored the 6s and kept the 5s. It seemed to work well enough.
We ignored the 6s and found it worked well. Good luck!