The third game of this campaign was not played as the Para’s called in a massive naval bombardment, effectively delaying Von Luck’s Kampfgruppe. The fourth game, however, was played on the table, and ended with a close German victory!
Scenario
The Para platoon from the second game was too beat up, so Lucius brought forward his second and last platoon. Its mission to defend the Bas de Rainville, blocking my Kampfgruppe, who are still intent on the Orne Bridges. The naval barrage means that this scenario is being played on Game 4, instead of Game 3. My 1st platoon is back into the fight.
Terrain
The battlefield is called “the corridor of death” in the scenario, due to the high walls and hard cover present everywhere. Available German armour is converted French vehicles, and is too light to breach the walls, which makes the battlefield a succession of obstacles for infantry. The chateau is just a normal house, but I called it the manor in my planning (2 on the planning picture below), and the semi-ruined house across from it I called the corner house (labelled 1). They were the focus of my plan.
The walls were all 3D printed over the last few months and hastily given some paint. They do come with clips to hold them together, but I didn’t bother with that as I’ve been having some difficulty getting clipped together pieces apart! Once again my green Cigar Box Battle Mat is photographing brown and grey, so the pictures will alternate in black and white as I try to decide which I like better!

The Paras are defending the left of the picture, the Germans entering on the right. 
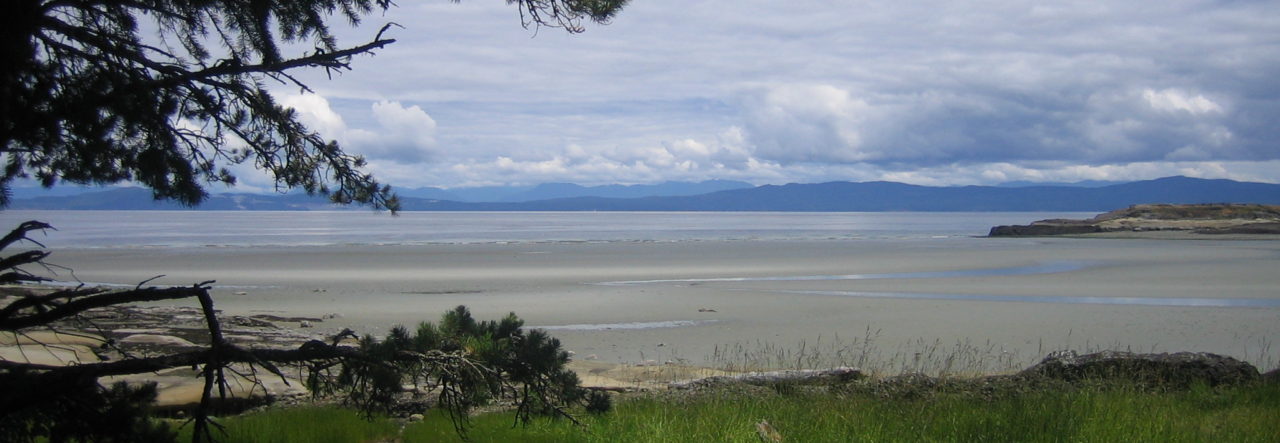
The view down the main road towards the advancing Germans
Forces
The Para platoon is at full strength, and has 7 support points to allocate for extra help on the ground. That means a full platoon with a robust Platoon HQ (2″ mortar, sniper, PIAT team, Pl Sgt), 2 sections, each with a Bren team and a rifle squad, as well as a section with 2 Brens and a sniper. Lucius took an extra section and a flamethrower team. Flamethrowers are devastating at close range, and with the extra section of elites he had a sizeable force. We missed this in the game, but the Paras should have received a free entrenchment, having had some more time to dig in due to the Naval bombardment. We’ll be seeing extra entrenchments as the fight continues.
The Germans brought up 1st Platoon for this fight, 3rd platoon having been pinned under the naval bombardment. 1st Platoon is down 2 men, so will deploy without a Panzerschrek, which isn’t a large loss when Allied armour isn’t even on the beaches yet. I had 19 points of support, so had a large range of options, my final choice described below.
The Plan
I knew that this was the last platoon that the Paras had. If I won here, there was a fresh, isolated platoon in the church from 13 Para, but the last scenario would see me facing the same men. Once again, I wanted to cause casualties, and this far in, I was happy to lose men as I still had 3 mostly intact platoons.

The options for advance were limited, but the Paras would be equally hampered as the high stone walls work both ways. I had considering buying a halftrack, or a car, and rush troops up the road. With a limited field of view and pre-game barrage, I thought I could take one of the two houses in beyond the field. That seemed a little aggressive, so I decided to focus on the left. I would use a Werfer pre-game barrage, which is more effective than normal as it restricts deployments to 5-6 on a D6 until turn end. I would then deploy up on the left, push to take the corner house with 2 squads and a senior leader. A Forward Observer (FO), would stay on the left, aiming to break up any movement and allow me to isolate any troops.
On the main road I would deploy the PAK 40 auf S307(f) (a PAK 40 mounted on a French half-track, played by a Wespe for this game). This gun was enough to lay a large amount shock and maybe some kills on troops using the corner and manor house and support the infantry advance.
On my right, I would use a support squad and potentially my 3rd squad to enter the field, take up behind light cover in the hedges, and, using covering fire, and fire and movement, put pressure on my right. Finally, and adjutant would allow me to deploy my platoon commander with no repercussions to later troop deployment.
The Fight
The Patrol Phase went better than expected, but the overall result was my Jumping Off Points (JOPs) were where I had wanted them. Lucius spread his JOPs out, 2 up, 1 back in typical fashion – except he made sure to keep them more than 18″ apart so any possible barrage wouldn’t cover 2 of them. They were notably not in the houses, a sign that this would be more interesting. The houses do provide cover, but they’re also excellent targets. Lucius had considered placing a JOP up on my right near the hedges, but then decided against it – which he was later to regret.
Para Force Morale started at 9, as did the German. A tie was broken in the British favour, and Lucius, rolling a 4,3,2,2,1 decided to hold his deployment while the Werfer barrage was raining down.

Para JOPs in blue , German in Red.
My phase, and my first roll is 6,6,6,6,3! Yet again! My pre-game barrage is ended by me! I’m glad that years in the Navy have increased my vocabulary so I could curse appropriately when the random event was a mortar barrage that landed on my right, effectively stopping any deployment on my right for 2 phases. I’m really not sure what I did to offend Saint Barbara, but really, this pre-game barrage failure is getting old!

The random event sees my right flank locked down for 2 phases. My JOP is under the Citroen.
This meant my attack would only be on one flank at first. Lucius was cursing himself, because with the barrage on my right, he could have deployed from a more forward JOP and potentially turned my flank and captured a JOP before I even got started! Luck, though is fickle, and no one could have guessed the Werfer barrage would fall short onto my own line of departure. The only good news is that I now have a full Chain of Command die, that I will keep for a key moment.
I deployed 1st squad up on the left, followed in the next phase by 2nd Squad deploying on overwatch, a FO (contacting the battery), and my PAK 40 on overwatch. 1st Squad raced up as fast as they could towards the corner house (#1).

1st Squad comes on, only to rush up the next phase 
2nd Squad comes on with the FO and goes into overwatch 
The armoured support arrives and sticks close to the snacks for the game.
Paras, 6,4,2,2,1. The Paras, like in real life, decided to be aggressive. 9″ deployment meant that a support section deployed into hand-to-hand combat with my 1st Squad. 19 dice for the Paras against 16 for the Germans (not all of their MGs could come to bear) resulted in the Germans losing 1 more than the Paras and falling back. Luckily for me, I killed his Section Commander, dropping Para Force Morale down to 7. My own Squad leader was wounded, bringing my Force Morale down to 8. The riflemen in 2nd Squad who had a clear line of site tried their hand, but missed.

The Paras deploy into hand-to-hand combat
My phase. 6,4,3,2,1. The FO called in a ranging shot that deviated a little bit, but was close enough to stop any developing counter attack on my left. 1st Squad, having fallen back last phase opened up on the Para section and wiped out the Bren team, reducing Para Force Morale to 6.
Lucius. 5,4,3,3,1. The Para section jumps the wall into the yard of the corner house and 1 Section comes on, on my right.

Remains of the support section jump the wall 
1 Section appears on my right
I get a double phase, 6,6,5,4,4. The Senior Leader comes in and the mortars fall on target, breaking a team and Para FM drops to 5 vs the Germans at 8. So far, so good.

Barrage comes down a little close for comfort and is shutting down the centre of the table but is adding casualties
4,4,4,1,1. My next phase isn’t useful, so I shift the barrage and turn it over to the Paras.
Now fate changes side and Lucius rolls 6,6,5,4,2. 1 Section moves up on my right and his Platoon Sergeant shows up on the other side of the barrage to stop the routing team and rallies shock off of them.

The platoon sgt moves into the open to rally the shock off of a support team. This did not go well… 
1 Section advances to the hedges and puts pressure on my right.
Paras. 6,5,3,2,1. Shock is rallied off, and 1 Section is on overwatch on my right. With my own barrage blocking my advance on my left, and a full section of elites at close range (inside the range of SMGs) on my right, I’m beginning to wonder what will happen.
Germans. 4,3,2,2,2. I bring a support squad on my right, deploying them over the wall and into a firefight. They suffer 2 casualties in return for killing a man on the Bren team. On my right I move up with 1st and 2nd Squad, removing shock, and ordering the barrage to shift north, hoping to open up a route to the corner house.

The support squad after the first exchange of fire. They’re looking a little light on the ground.
Paras. 5,2,1,1,1. More firing on my right. 1 Section hits my support squad killing 2 more men. The 2″ mortar comes on to join in the fun and drops smoke in front of my support squad.

2″ mortar in the foreground supporting 1 Section in the hedges.
Germans. 6,5,3,1,1. Sensing that my right is getting vulnerable, I order the support squad back over the wall. They’ll hold the JOP and stop any movement on that flank while I push harder on my left. The mortar barrage has shifted and is now hitting the Platoon Sergeant, wounding him. Para Force Morale drops to 4. The Paras now only have 4 dice to use for activations. I’m still at a Force Morale of 8, but I have lost 1 of the 2 fights so far, and my barrage is stopping my rush on my left. I have to decide whether or not to shift it to the table edge and free up the JOP by the corner house.

My support squad retreats to the JOP as smoke comes in from the 2″ mortar.
Paras, 6,4,2,1. The 2″ mortar drops some more smoke between 1 Section and my support squad on the right.
Germans. 6,5,5,4,2. I move the barrage up, adding shock to the remnants of the support team and push up my 2nd squad to try to lock down the JOP by the corner house but don’t make it far enough.
Paras. 5,3,2,1. A flamethrower comes on. I use my Chain of Command die and play an interrupt, all of 2nd Squad hurriedly unloading on the flamethrower team which is wiped out. Para force morale takes yet another hit and is down to 3.

2 Squad fire as the flamethrower team leaps the wall on my left.
Germans. 6,5,4,2,1. I move 2nd Squad up to the wall, hoping to jump the wall and capture the JOP by the corner house. The barrage is called in again and the last men of the support section are killed but Para Force Morale stays at 3.
Paras. 6,5,1. Finding a gap just outside the barrage, a sniper lines up and hits my platoon commander… and kills him outright! German Force Morale drops 2 to 6. Not good.
Germans. 6,5,4,2,2. With the loss of my platoon commander this doesn’t give me a lot except another full Chain of Command die. 1st and 2nd Squad move up and 2nd Squad jumps the wall. Almost to the JOP!

2nd Squad is at the wall, 1st Squad in support and the JOP almost within reach!
Paras. 4,3,2. The Paras wait for me.
Germans. 6,5,4,1,1. I don’t want to lose the chance to shift the barrage, so begin to move it towards the manor house. I really should have combined the 1s into a 2 and moved to take the JOP…
Paras. 4,3,2. Using his only Chain of Command die, Lucius moves his JOP 18″ to be behind his 1st Section and in front of the manor. Seeing as the stone walls block all view, this makes sense to me. I was THAT close to the JOP! Drat. Lucius brings on 3 Section on overwatch on my right in front of the moved JOP and close to the crossroads.

The JOP is now in the field in front of the manor. I’m going to have to pivot and try to take it.
Germans. 6,4,3,2,2. I move the depleted 1st Squad to the wall of the corner house. 2nd Squad will stay forward on the left to try to keep pressure on.
Paras. 6,1,1. The sniper fires at 2nd squad, but misses as the 2″ mortar blinds the PAK 40 auf 307(f) at the crossroads. I think the Para’s are getting ready to assault and try to take the JOP on my right.
Germans. 3,2,2,1,1. 2nd Squad goes on overwatch trying to find the sniper that shot at them, while 1st Squad jumps the wall into the courtyard of the corner house. The platoon sergeant is hit again (again) by the barrage, but still no more wounds.

The last picture of 1st Squad before they’re wiped out in the courtyard beyond.
Paras. 5,3,1. 3 Section advances tactically closer to the wall on the main road.
Germans. 5,5,3,2,1. I order repeat on the barrage, still not able to kill the injured platoon sergeant. I move 1st Squad to the edge of the wall near the corner house and recall 2nd Squad. The action is going to be in the centre and 1st Squad is too beat up to do more than hold.
Paras. 6,2,1. 3 Section jumps the wall and is within 4″ of my 1st Squad and right next to an open gate. The Paras muster 21 dice and I get 10. I roll amazingly well, with 8 kills and 5 shock to the 7 kills and 3 shock that the Paras inflict. With only 6 men on the table though, my 1st Squad is gone, and my Junior Leader has been killed. I state I’m going to use my Chain of Command die to avoid one roll for Force Morale but forget to do that and roll dice for both my section and Junior Leader! Gah! I could’ve kept my Force Morale at 5, but now it is down to 3. Not good. The Paras lost a team and a Junior Leader wounded, and their Force Morale drops to 1. I remove the JOP in front of the manor, hoping to try to leave the Paras in the field exposed. I can’t afford any more losses to Force Morale and still win. This will be tight. I’m facing 2 full Para sections (2 Section hasn’t been deployed yet) and I’ve got 2 squads to do it with.
Germans. 6,3,1. I call in the barrage again and it finally kills the platoon sergeant. Para Force Morale drops to 0 and I’ve squeaked out a victory! As an added bonus, I manage to capture 3 Paratroopers, as they are more than 12″ from their JOP.
Aftermath
Well, that was something else! My initial plan was sound, but once again, the pre-game barrage was wasted. The PAK 40 was useful in that it helped to keep the Paras out of the buildings I was interested in. I should have prioritized pushing up on my right earlier, even if I had to slow down my rush on my left. Losing the ability to hold my right flank meant that I was constantly worried about that side.
The aggressive defence on my left was concerning, but caused relatively light casualties and ended up with Para Force Morale taking a serious beating. After the flamethrower deployed, I should have rushed the JOP and not tried to position my squads perfectly. I was worried about 2 Section being deployed into close combat, but I should have realized that while I would likely have been badly bloodied, the Paras can’t stand to lose many men. The counter-attach across the main road was interesting and had me worried when my Force Morale came crashing down. Next time I’ll ignore the first roll so I won’t forget to avoid the test!
Our next encounter will be Scenario 4: Church on the Flank, which is defended by 13 Para, who have a full platoon ready to fight.
German Situation
The difference in Force Morale means that the Germans lose 4 not to return, 2 in the aid station to return after one game, and 2 returning immediately. I did lose a Platoon Commander and Squad Leader and I receive no replacements according the Campaign. That means 1 Platoon is down 2 leaders. I’ll have to decide what to do with the men – I don’t think I’ll risk sending them in with a squad leader who is filling the role of platoon commander while I still have 2 platoons on the board.
Von Luck is happy, his opinion going up 2 points to 4, giving me a bonus to support options. My men’s opinion is unchanged, but I still receive a bonus to my Force Morale rolls as the Orne Bridges get ever closer.
British Situation
The Para platoon suffered more. The majority of the casualties were from the support section, but there were still 10 men down at the end. This means that 5 are gone permanently, including 1 platoon sergeant, which will likely be felt later. The other 5 who were hit will be recovered by the time we meet again in Scenario 6. There is an additional 3 men captured, so the platoon is down 8 men for the final fight – assuming I get there!
The CO of 12 Para is less happy. His opinion drops by 1 to -2. The men are getting tired of being pushed back and their opinion falls by 3 to -6 which gives a -2 to Force Morale rolls and reduces the Platoon Commander’s command range as the soldiers consider him “dangerous.”
Wonderful report! I like the mix of colour and B&W pictures. I look forward to the next installment.
Thanks! I’m not sold on the switch between black and white yet. I think the colour adds detail, but the black and white makes it seem a little more real as it hides colours that aren’t right. Next game this week we hope!