Chain of Command Delaying Action Part 2

Background

A little while ago Lucius and I played a delaying action to get better acquainted with Chain of Command. It was a close run thing and we decided to switch sides and try a re-run over the same terrain.

The Forces

I played my Fallschirmjager and had 14 support points, Lucius had 7 for his North Nova Scotia Regiment. Note that we were using the core-rules only (not the arsenal that can be found at Tiny Hordes and other places). Lucius was an armoured officer so I hemmed and hawed and out-thought myself, figuring that he’d bring some armour or AT to the field. With 14 points I could field my new Tiger II. His PIAT wouldn’t do anything against that. So, I reasoned that he would have to take a 17pdr, or a tank-hunter. In order to get around that, I went with a pre-game barrage, a 5cm mortar team, a Sdkfz 250 (hanomag) manned by half of my 3 section, and a Sig 33 infantry gun.

It turns out that Lucius bought a sniper and a Vickers MMG. Of course. Had I shown up with a Jagdtiger or any sort of heavy armour he’d have been overrun in minutes. But such is life and wargaming! It really shows that you need to make sure you plan for maximum flexibility. Last game we only had 2 sections, but this time we each fielded 3. Lucius brought 2 sections of North Novas with 1 section of Commandos as the North Novas were a little short. The added firepower from those many SMGs were made up for by my force rating.

The Battle

We played for about 3 hours and things moved quickly at first, but got bogged down in casualties after a bit. I started with a force morale of 10, Lucius had 8.

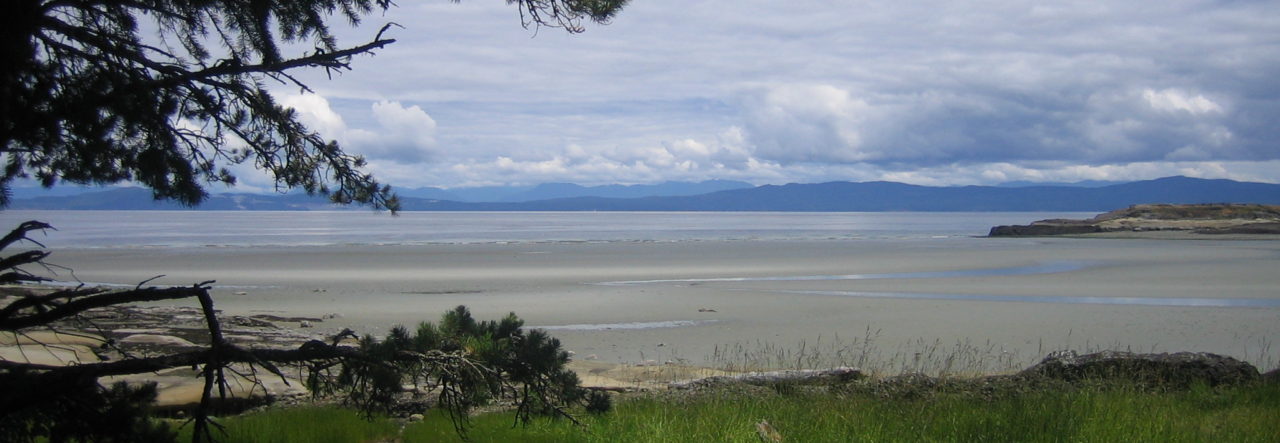
The patrol phase was uneventful, with reasonable JOPs for both of us. I needed to take a JOP in a specific swath of land at the far end of the table, and only one of the JOPs was there. So, the left flank was my priority. I was going to see if I could rush it, or if not, pin down resources there while my hanomag and remaining troop did an end run around the woods. In red below are the Canadian JOPs. #1 is my real goal.

My initial plan. 1 Section left. 2 Section right. 3 section detachment watches over JOP #2. 2 Section then pushes straight or around the right flank. The remainder of 3 section is in the hanomag which will flank on the right.

The pre-game barrage did its trick and I brought in 1 section on the left flank and pushed up past the wood. The non-tasked squad from 3 section put covering fire into the woods on the right flank near the JOP there as 2 Section moved up.

There was no response from the Canucks. It took until the third Canadian phase for some movement to happen at the far end – 1 section deployed near the JOP on my right flank. My 5cm mortar started its impressive kill count and killed one of the 2″ mortar (which I hate; that thing and its smoke!). My 1 section rushed the house at the double and fell short. Twice. 7 measly inches forward on 3d6.

And then the turn ended and Lucius got a double-phase with three 6’s rolled. Great. Shortest turn I’ve seen in Chain of Command and now my boys were strung out a little too far forward from their supports and I still hadn’t managed to get my hanomag up to do an-end run around the woods on my right side or get my big infantry gun to put some hurt on the Canadians.

Lucius’ sniper showed up at the start of the turn, caused some shock and then in the next phase killed the JL in 1 section – the section that was SOOOO close to the house and the key JOP behind it. Force morale goes down. My dice failed me and I couldn’t move 1 section either back or forward with their JL dead, so I brought my Sig 33 on and my hanomag while pushing forward on the right flank.

1 section on the left getting hurt. 2 section limping forward slowly

The sniper fired again at 1 section, as did some of Lucius’ troops on my right flank. Another section appeared near the house on the left.

North Novas push up on my left flank. Getting ready to defend the JOP just off the frame to the right

My boys were leaderless, gaining shock, unable to see the sniper, taking fire from their right flank and having a full section of enemy appearing to their front. This wasn’t good. Added to that, the silly little 2″ mortar dropped smoke in front of my Sig 33. Great.

I deployed my platoon 2IC (unteroffizier) on my left and pulled back 1 section as my 5cm mortar killed the 2″ mortar! As far as I was concerned, that was a win for the entire game. My right flank stuttered forward (2″ on 2d6) but I sensed that I was getting into the right place. Lucius was putting his section on my left flank in front of the house there, in line of fire of my field gun. On my right, I had 1 and a half sections moving up, one group always on overwatch. The hanomag was getting ready to support, and my 5cm mortar was dropping rounds to weaken the enemy on that side. So I ended the turn with my only Chain of Command die (at that time) to take away the smoke in front of my Sig 33.

A double phase for me. The Sig then fired and evaporated 2 of the bren team facing me on the left flank and wounded the JL. 1 section moved forward and laid more hurt on the Canadians to my left. On my right, wanting to try out this Handgranaten rule, I charged into the smaller Canadian section.

Plucky North Novas ready for hand-to-hand combat defending JOP #2

I only got 1 grenade in but we won. Or lost. I’m not sure. We both killed everyone. Except for the leaders. Morale goes down to 6 for both of us. I was within 4″ of a JOP there though, and my weapons team from 3 section was close by.

Lucius added some shock and a kill to my Sig 33 from the section and sniper on that side, but not enough. My field gun replied at the section it could see, and with 1 section under the command of my platoon 2IC killed the bren team and all but 1 rifleman and the wounded junior leader, leaving them running with 11 points of shock between them. 2 Section goes on overwatch. The sniper fires and I see him! And kill him. All that action brings force morale down to 4 for the Canadians. Left flank steady.

Nothing except 2 scared soldiers and a platoon lieutenant between 1 section and the JOP! Except for the Vickers and a squad of Royal Marine Commandoes who haven’t shown up yet and could ambush me. Huh. Okay. Focus on the steadying up my right flank and slowly push up on the left. No crazy stunts.

On the other side the 2 JLs engage in hand to hand combat and both fall. That wood is now called Bois-du-mort. 20 men lying there now, and more to follow shortly. Lucius plays a Chain of Command die to avoid a force morale check or he’d be on the wire. He also brings on the Commandoes and wants to get in close combat with my 3 section weapons team. I back them off, bring up my hanomag onto overwatch.

Uh guys?!

As I had backed off from the JOP, and hadn’t managed to capture it, it’s used to launch a PIAT ambush at my hanomag. Double 6s are rolled and the hanomag brews up but my men get out unhurt. 3 unanswered kills for that PIAT. My next great foe…

There goes the ride!

The commandoes then charge into fire at my weapons team at close range with their SMGs. I play an interrupt to fire at them, which whittles them down, but they still rip into my men. I get everyone on that flank firing and 1 of the teams break but I stabilize the situation overall. There are 5 commandoes left facing 6 of my guys plus a mortar. I outrange his SMGs so I should be able to break him. I still have a heavy field gun with 4 crew plus JL, but the challenge will be to get this beast into action (it takes the lower of 2d6 rolled to move).

On the left the heroic Canadian platoon lieutenant rallies enough shock off of the remains of the section I massacred that they join him behind the wall near the JOP. I have 8 men from 1 section plus my unteroffizier 2IC. Should be fine. Except that the Vickers hasn’t shown up…

We left off there. 20 Canadians lying dead or wounded. 17 Germans. I haven’t brought on my Panzerschrek, and Lucius has a Vickers team and his PIAT still off the table. This will be a near-run thing! My left flank is okay, but vulnerable to the Vickers. Support is a long way behind. On my right I’m pretty evenly matched. I’ll need to be clever or lucky (or both) to win this.


A Slow Weekend

This past weekend was a slow gaming weekend. Family and household tasks got finished, which is nice, but no wargaming or RPG occurred.

I did manage to get the first bit of camouflage paint on my FJ support. I need to work on tracks/wheels and do a wash, but these at least are coming along. I found it interesting that the Wehrmacht did not have a standard camo scheme, and after looking at pictures of AFVs in museums or in historical texts and online, it really seemed like some were sprayed, some were painted and as long as there were three colours I’d be good. I also noticed that quite often vehicles were not photographed with designations or squadron/battalion numbers. I will be ordering some decals nonetheless, as I like the look of them. All that to say that I am happy to note that I’m not breaking the mould as there is none so on I paint!

The AFVs are moving towards completion

An additional gaming related event happened today: the arrival of a medieval tower I purchased last week from the Wargames Alchemist. The price was very reasonable, the process was quick and painless, and the product was as ordered and very well packaged. It arrived quickly and I’ve now taken to looking at the ‘Alchemist’s site routinely. It is a mix of 15, 20 and 28mm so far spanning Ancients to WW2 so I suggest that you check it out!

The tower – a great centre piece!

Work in Process – Fallschirmjager

Well, I’ve finally been following through with my goal of doing 1 project at a time and finishing it before moving on.

FJ Officer

My Fallschirmjager are almost finished, and only need some touch-ups (and the flamethrower needs the flame painted). I need a bit more work on the camo but these are pretty much table ready! If people are wondering, I’ve been aiming for the Sumpfmuster 43, I’m using the Artizan FJ painting guide found on this page.

The FJs assemble

My goal was to paint up a force of FJs that met 2 criteria:

  1. Look like FJs
  2. Look good on the table

I think I’ve met that already, which is nice. My troops are a mix of plastic and metal Warlord as well as some nice Blacktree sculpts. I’ve got:

  • 4 sections of 10 men each including 2 x MG42 teams per section
  • 1 mortar team
  • 1 flamethrower team
  • 3 Panzerschrek teams (only 1 painted so far)
  • 2 sniper teams,
  • 4 pioneers
  • Pak 40
  • Sdkfz 251
  • Sdkfz 222
  • Panzer II Luchs
  • Stug
  • Tiger
  • Tiger II
  • MG 42 (primed but not painted)

That should give me plenty of options for the table and gives me something for every support list in Chain of Command The only things I’m thinking about adding are a FOO and a flame tank (either Panzer III Flame or captured Char B – Panzer B2 [F]).

My next push is the ’42 and the last of the Panzerschrek teams and then the vehicles. The Tiger 1 is almost done, just needing the decals under the Tiger II. The rest will be getting finished shortly.

Lucius has got a pretty wide range of Brits and Canadians with armour painted up and I’ve got a Humber AC and another Sherman almost done, so we’re hoping to be able to press on with Arnhem or Caen in a short bit. Another delaying action played over the same ground as the last game then a push to get the terrain painted and then we’ll start the campaign!

It’s been so nice to actually focus on a project and make real progress on it. Once these guys are done I’ll be able to varnish them and switch focus to something else on the list. Probably my  1:1200 ships… 


Chain of Command – Delaying Action

Lucius and I played a game of Chain of Command over two afternoons recently. It was great fun, and a needed refresher on the rules. The total play time was about 4 hours, but that was a lot of looking up rules and figuring out how to best employ our troops. It was a very friendly game and quite fun. We chose the delaying action scenario from the rule book, threw some terrain down, and started off with small platoons and some armour for good fun.

Here’s how it went down.

Background

Allied forces have pushed inland from the Normandy coastline. A platoon of the North Nova Scotia Highlanders with some Sherbrooke Fusiliers in armour support is racing ahead. They have been spotted by a unit of Fallschirmjagers who are headed west towards Brest. The FJ platoon is tasked with holding off the Canadians for as long as possible. The Canucks must capture 1 Jumping Off Point (JOP) to win.

The table was 4 x 6, with play down the long axis. There was a lot of terrain on the table, as we wanted to improve our knowledge of the rules and make it a bit easier to advance to contact.

The table from the Allied entry. My Jumping Off Points are in proximity to the numbers

The Forces 

The Canadians fielded 2 sections of North Novas, with a Command section (PIAT team, 2″ mortar team). Support points went towards a medic and armour. Of course. While the AVRE was almost chosen, Lucius went with a Mark V Sherman and a Firefly.

The very pretty Firefly
Lucius has put small coloured markings on base of each unit. It is hard to make out here (the blue dot) but is more clear in real life

The FJs had 2 sections, a Command section with a panzerschrek, and a STUG. I had seriously considered a flamethrower and sniper, or a PAK 40. In retrospect, either might have been a wiser call…

My FJs are almost painted!

The Battle

The patrol phase was uneventful. I managed to push out aggressively which wasn’t that useful as it made me want to take ground and I ended up placing my JOPs too far forward. Considering that they were Lucius’ objectives, that was my first mistake and I later had to move them back and eat up precious Chain of Command points.

The action started off with the North Novas moving up 1 Section to advance on the right flank towards JOP 3 as their armour made an appearance and moved up to go hull-down behind the first hill on the road.

1 Section peaks out behind cover and finds out that there are Germans in the woods

I responded by bringing up my Panzerschreck and a section of infantry. This was my biggest mistake in the game. Not having the ability to bring this where needed later made me eat up a lot of command resources trying to get it into action. Having it in my pocket to spring as an ambush when the armour closed might have changed the outcome.

In any event, I put some hurt onto 1 Section until smoke rounds blocked me.

My section is thwarted by the smoke from that annoying 2″ mortar

The North Novas followed up by leaving the tanks in the centre with 2 section deploying on their left flank and moving up aggressively towards JOP 1 (which was behind the house in the picture above). I placed a section in the house to their front and put an MG team upstairs. I managed to put some shock on 2 section before drawing an ungodly amount of fire from the Firefly.

My team scampered away from the upstairs and calmed down under the guidance of the platoon sergeant while on the other flank, my platoon commander pulled the section by JOP 3 back after moving the JOP to the rear. The presence of that section by JOP 3 effectively held down the Canadians there for most of the game. I wasn’t able to counter attack despite bringing my STUG on to support that plan due to the presence of the PIAT and an every increasing amount of smoke blocking most avenues of advance. I wasn’t willing to charge forward unsupported.

The battle by JOP 1 was brewing up, with the Canadians making 2 charges towards the house, but were beaten back both times leaving most of their section on the field having fallen victim to the MG42 that had relocated downstairs. I played an interrupt to fire a panzerfaust as the Firefly closed to get a better line of sight to pound the ground floor, but I missed! Drat. To make matters worse, I had divided the section on that flank, with 1 team in the house, and 1 on a hill behind it. I was certain that Lucius would rush up with his armour and troops, and I wanted to have the ability to defend the JOP behind the house so that left my last panzerfaust safely in the rear. Sigh.

More tank rounds went in to that house as I moved my STUG and Panzerschreck up (which took forever). The Firefly then went on overwatch with the remains of 2 section and the Sherman advanced up the road. I figured it was time, so I opened up with the remains of the section in the house, did a good job cutting down the Bren team as my Panzerschreck rushed to take a shot. An interrupt was played and an HE round killed both members of the team. Drat. I now had only 3 anti-armour rounds and 1 STUG. So that went forward in the next phase. Lucius played his last Chain of Command point and shot first.

Well, there goes that plan. The Firefly avenges 2 Section (on the ground in middle)

Now I was in trouble. I had inflicted far more casualties than I had taken, but I had only 3 panzerfausts for 2 tanks. And the Sherman rushed down the road as 1 section went away from JOP 3 towards JOP 2. I moved my troops in response and had a panzerfaust ready for the Sherman on the road. It missed. Double 1s. Oh dear.

I managed to lay the hurt on 1 section in a last hurrah and then called it. I had downed 18 of the 27 Canadians for 8 of my 24 FJs but I had no effective anti-armour ability left.

Thoughts

The game played very well and it seemed very realistic, with tank fire supressing the defenders until close range, smoke obscuring the defenders, and the terrible toll of being caught out in the open facing a dug-in foe for the final yards of the assault. If I could have added mortars to my force, I think I would have ground down the infantry and broken them. Mind you, if the Allies had brought up an AVRE, I would have been hooped. Flexibility is key, and on that front, a PAK40 is far more flexible (for deployment and survivability) than a STUG is.

Almost ready for action!

I think that the next battle will be a switch. Lucius defending the same town, and me advancing. It should be fun, and if nothing else will expand our ruleset knowledge before we press on with our Arnhem campaign. It also will give us time to finish painting up our forces!